* Note: You must have Read and Modify permissions to perform this action. Additionally, you may have permissions to edit or delete some files but not others.
To see and edit the details of a file
1. Go to Documents: Document Library.
2. Locate the appropriate file in the hierarchy and click its name.
3. Click the Details link in the preview pane on the right. The following page opens.
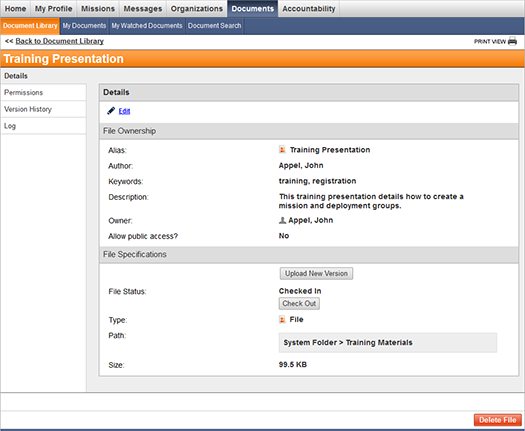
4. In the upper left corner, click the Edit link.
5. Edit the file's details as appropriate:
Field |
Description |
Alias |
Specify a file name or alias that appears as the title of the file in the document library. Aliases are used in document searches. |
Author |
Specify who created the file. The author's name is used in document searches. |
Keywords |
Specify any keywords for the file. Keywords are used in document searches. |
Description |
Enter a description of the file. |
Owner |
This field displays the name of the person who has primary responsibility for the file. You can click the Change link to select a new owner, if necessary. |
Allow public access |
If you want all users to be able to view the file, click the Yes option. This action designates the file as Public so that users without set permissions can view it. By default, this field is set to No. |
Upload New Version |
This button allows you to upload a new version of the file. It is not visible when editing file details. |
File Status |
Displays whether the file is checked in or checked out. Click the Check Out button to check the file out for editing or click the Check In button to return the edited file. Click the Clear button to unlock the file for editing. File status is not visible when editing file details. |
Type |
This field displays whether the item is a folder or a file and cannot be edited. |
Path |
This field displays where the file is located. Note that System Folder represents the top level. |
Size |
This field displays the file size and cannot be edited. |
Tip: Use the Delete File button to delete the file if you have permissions to do so.
6. Click Save.